


Pelmeni have been a Russian tradition for generations upon generations, enjoyed by children, adults and the elderly everywhere. When my husband and I visited Moscow a couple of years ago, we learned that they are even served in restaurants. In fact, I've never met a Russian, American, or any other person who hasn't loved them (that is, unless you're a Veggie). The one thing about the Pelmeni is that they aren't easy to make. Some old school peeps still make them by hand, folding over the dough to lock in the delicious meaty filling. Others use this honeycomb to make them a bit easier:

This weekend my entire family (well, the ones in the US) got together at our house to celebrate my mom and dad's 50th anniversary. My mom and dad came from NJ, while my sister and her boyfriend drove in from MA. We're a perfect middle ground and we certainly love having them here. One little thing that you should know about the Russian folk is that they can't sit still or have nothing to do, so we always try to come up with a project or two to keep my dad from taking apart our appliances or lawn care equipment. This time we decided to spend the day making Pelmeni, partly to keep everyone occupied, but mostly to make sure that Lana (my sister) and I learned the family recipe to pass on to our children some day. To be honest with you, my dad still took apart some of the fans in the bathrooms and unclogged all the sinks, but at least our lawn mower is in one piece.
Let's get started. Please bare with me as these are recipes passed on by showing the next generation and learning from experience, so there are no exact measurements here.
Here is what you'll need:
Dough:
- Flour - a lot of flour. Depending on how many Pelmeni you are making at a time, but I'd say a couple of lb bags might do.
- Eggs (2-3)
- Water (no need to go to the store for this one)
- Salt
- Ground beef
- Ground pork
- Onions
- Salt
In a large mixing bowl, combine 3 eggs and 2 glasses of water. Use a hand mixer to blend the ingredients and begin adding flour about a quarter cup at a time. Continue to mix and add flour until the dough begins to thicken. You might want to use your hands here. Keep adding until the dough is thick and feels whole. Stick it in the fridge for at least 15 minutes to let it settle. It should look like this:
Now while the dough is in the fridge, make the filling:
Start by using a blender or a food processor to chop up the onions (about 3-4 large ones) until they are smooth.

You really want them to be completely smooth.

Now mix together ground beef, ground pork, onions, and a little bit of salt. You want about 1/2 part of pork for every part beef. And you'll have to use your hands.

You gotta really get in there.

No turning back now. Don't you feel great?
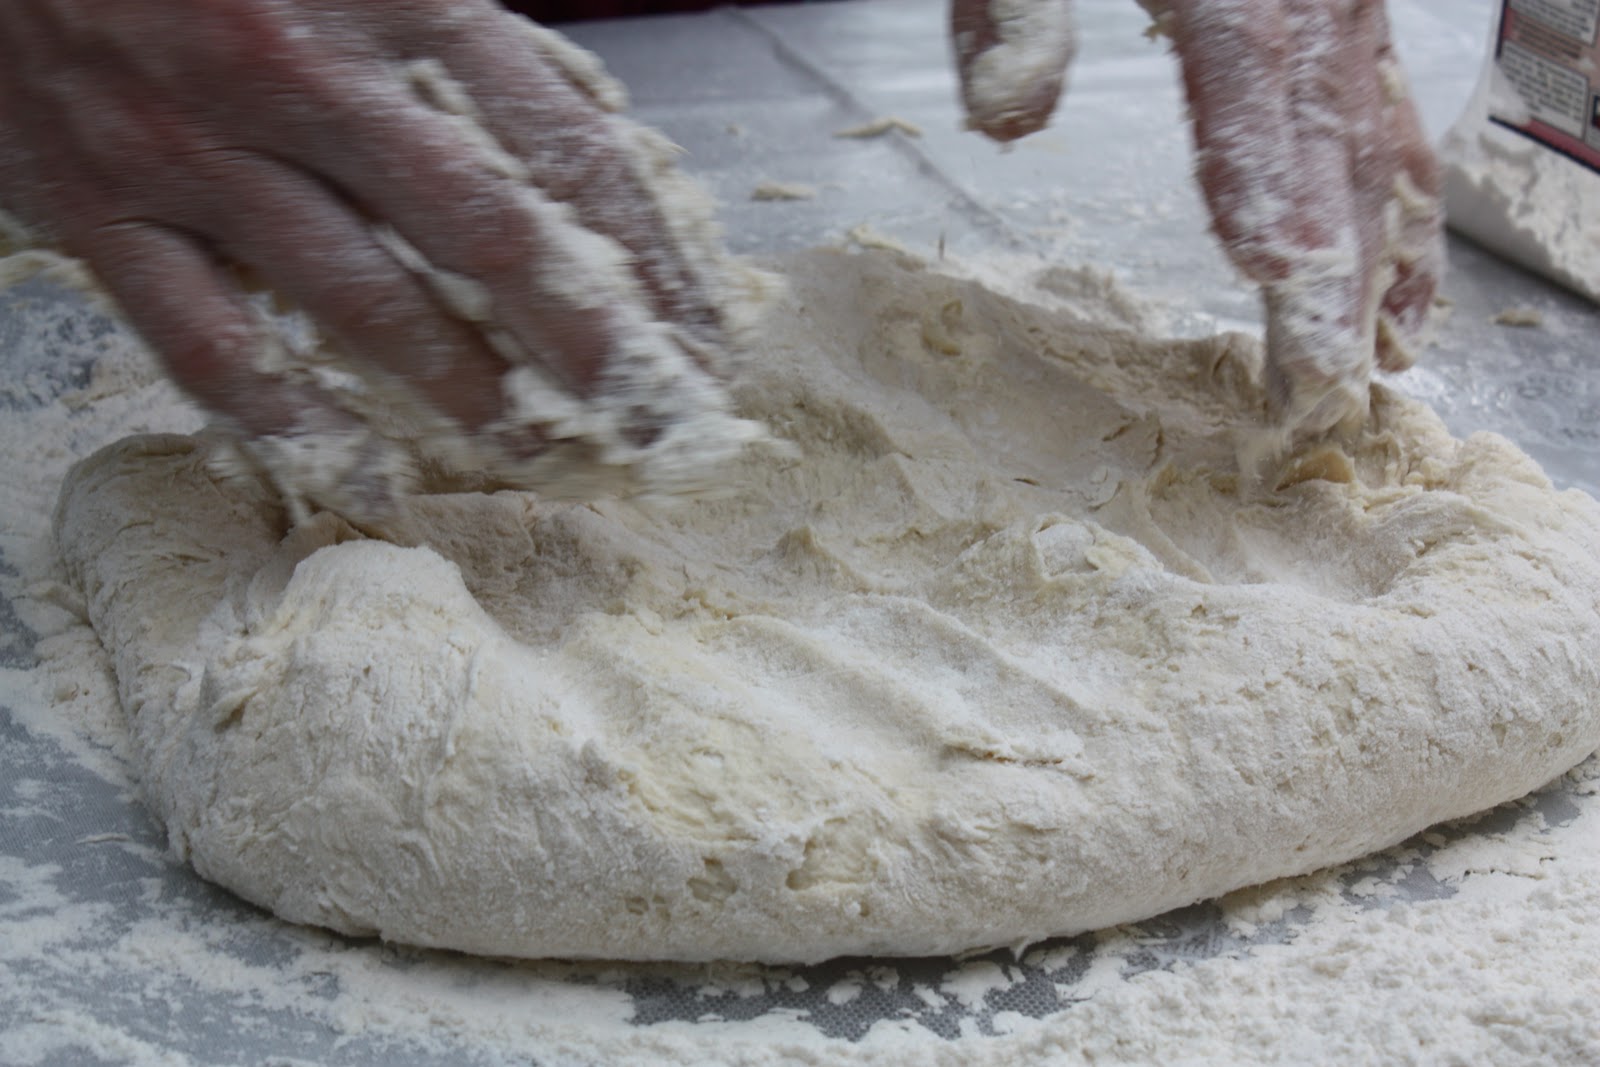
Time to pull that dough our of the fridge. You'll need a large and sturdy surface to work on. Since this was a family affair, we decided to use our porch table so everyone could gather around.
Now flatten the dough.

And use a rolling pin to get it thin, but not too thin.

It will be similar to a pizza dough.

You'll want it to be sort of round and about the size of the honeycomb.

Now gently put the dough on the honeycomb and use your palms to very gently press it down, just enough to see the outlines.

Here comes the fun part. You will need a fork and a lot of patience.

Using your fingers, take a small quantity of the meat filling (about a teaspoon) and put it in one of the holes. Use a fork to gently press the filling into the filling, making it flush with the honeycomb, but being careful not to rip the dough.

You want to make sure to avoid the area around the hole. It needs to be clear of all meat so the dough sticks together later.

This here step is called "forking" courtesy of my really mature sister.

We continued to make "forking" jokes for the next 3-5 hours. My entire family is really mature.
The result should look something like this:

Now take an equal piece of dough and roll it out the same way as the first.

Lay it on top of the meat filling and press it down gently with your hands.

Pat it down until you can see the outlines just a tad.

Now use the rolling pin to really press the dough together.

You'll want to press it down kind of hard until the honeycomb begins to cut through. Then take the excess dough off from the perimeter of the honeycomb and set it aside. You can mix it in with the rest to use later.

Now shake the Pelmeni out of the honeycomb with swift, hard movements.

They should all fall out. You might have to hit the cutting board nearby to force them.

You'll want to throw a handful of flour to make sure they don't stick together.

Now you get to turn around and do it all over again.

And again.

And again.

When you have a bunch of them together, throw them in the freezer for about 60-90 minutes to freeze them. You'll want to try and avoid putting too many of them on top of one another so they don't stick together or squish each other. Once they're kind of cold, you can take them off the tray and put them in a bag to store.
When you're ready to eat them, just boil however many you want (I eat the number of my age. It's something I've done since I was a kid. I'm not telling how many I ate today). You can add a couple of bay leaves and some salt, but I add a pinch or two of Vegeta.

It's the perfect combination of spices and salt. You'll know they're about ready when they float up to the top.

Yum!
Now put some in a bowl or a deep plate, depending on how much soupiness you like.
And now it's time to decide how Russian you are. Me? I'm pretty Russian, so I put about a tablespoon of Smetana (sour cream) in mine. My dad likes about a teaspoon of mayo in his. When I was a kid, I put both. My husband sometimes uses some soy sauce. He's not very Russian.

Look at that goodness.

Ah. Enjoy.


These look to die for! You're right, this post didn't get enough attention!
ReplyDelete